Import people into a campaign
This guide walks you through importing people — the contacts your campaign reaches — into CampaignCTRL from a spreadsheet. You upload a CSV file, line up its columns with CampaignCTRL’s fields, and the app either adds new people or updates ones you already have.
There are two ways in, and you pick the one that fits:
- Upload CSV — add people straight into your active election from a CSV file. This is the everyday path.
- From Previous Election — choose a past election cycle (or create one) and import a CSV into it. Handy when you’re bringing over contacts from an earlier campaign.
The one thing that trips people up: your CSV needs a header row — a first row that names each column, like
First Name,Street. CampaignCTRL uses those names as the columns you line up in the next step, so a file without headers is much harder to map.
Who can do this
| Action | Who can do it |
|---|---|
| Import people | Anyone who can add people — Owners, Admins, and roles granted People → Create |
Volunteers, Organisers, and field agents (Captains and Recruiters) can’t import people. (New to these roles? See User roles.)
Before you start
- Prepare your CSV. One person per row, with a header row naming each column. At a minimum include first name and last name columns; add phone, email, address, or anything else you want to bring in. Keep your rows contiguous — a single blank row is skipped, but three or more blank rows together tell the importer your data has ended, so it stops reading there.
- Decide: add or update? Adding creates new people. Updating changes people already in CampaignCTRL — and for that, every row needs an ID or External ID so the app can match it to an existing person. A row with neither can’t be matched, and will be reported as a failed row.
- Know which election you’re importing into. Upload CSV adds to your active election; use From Previous Election to target a past cycle instead.
Part A — Start an import
1. Open People > Imports
In the left sidebar, open People, then Imports. The page shows two ways to import, with your past uploads listed below under Recent Uploads.
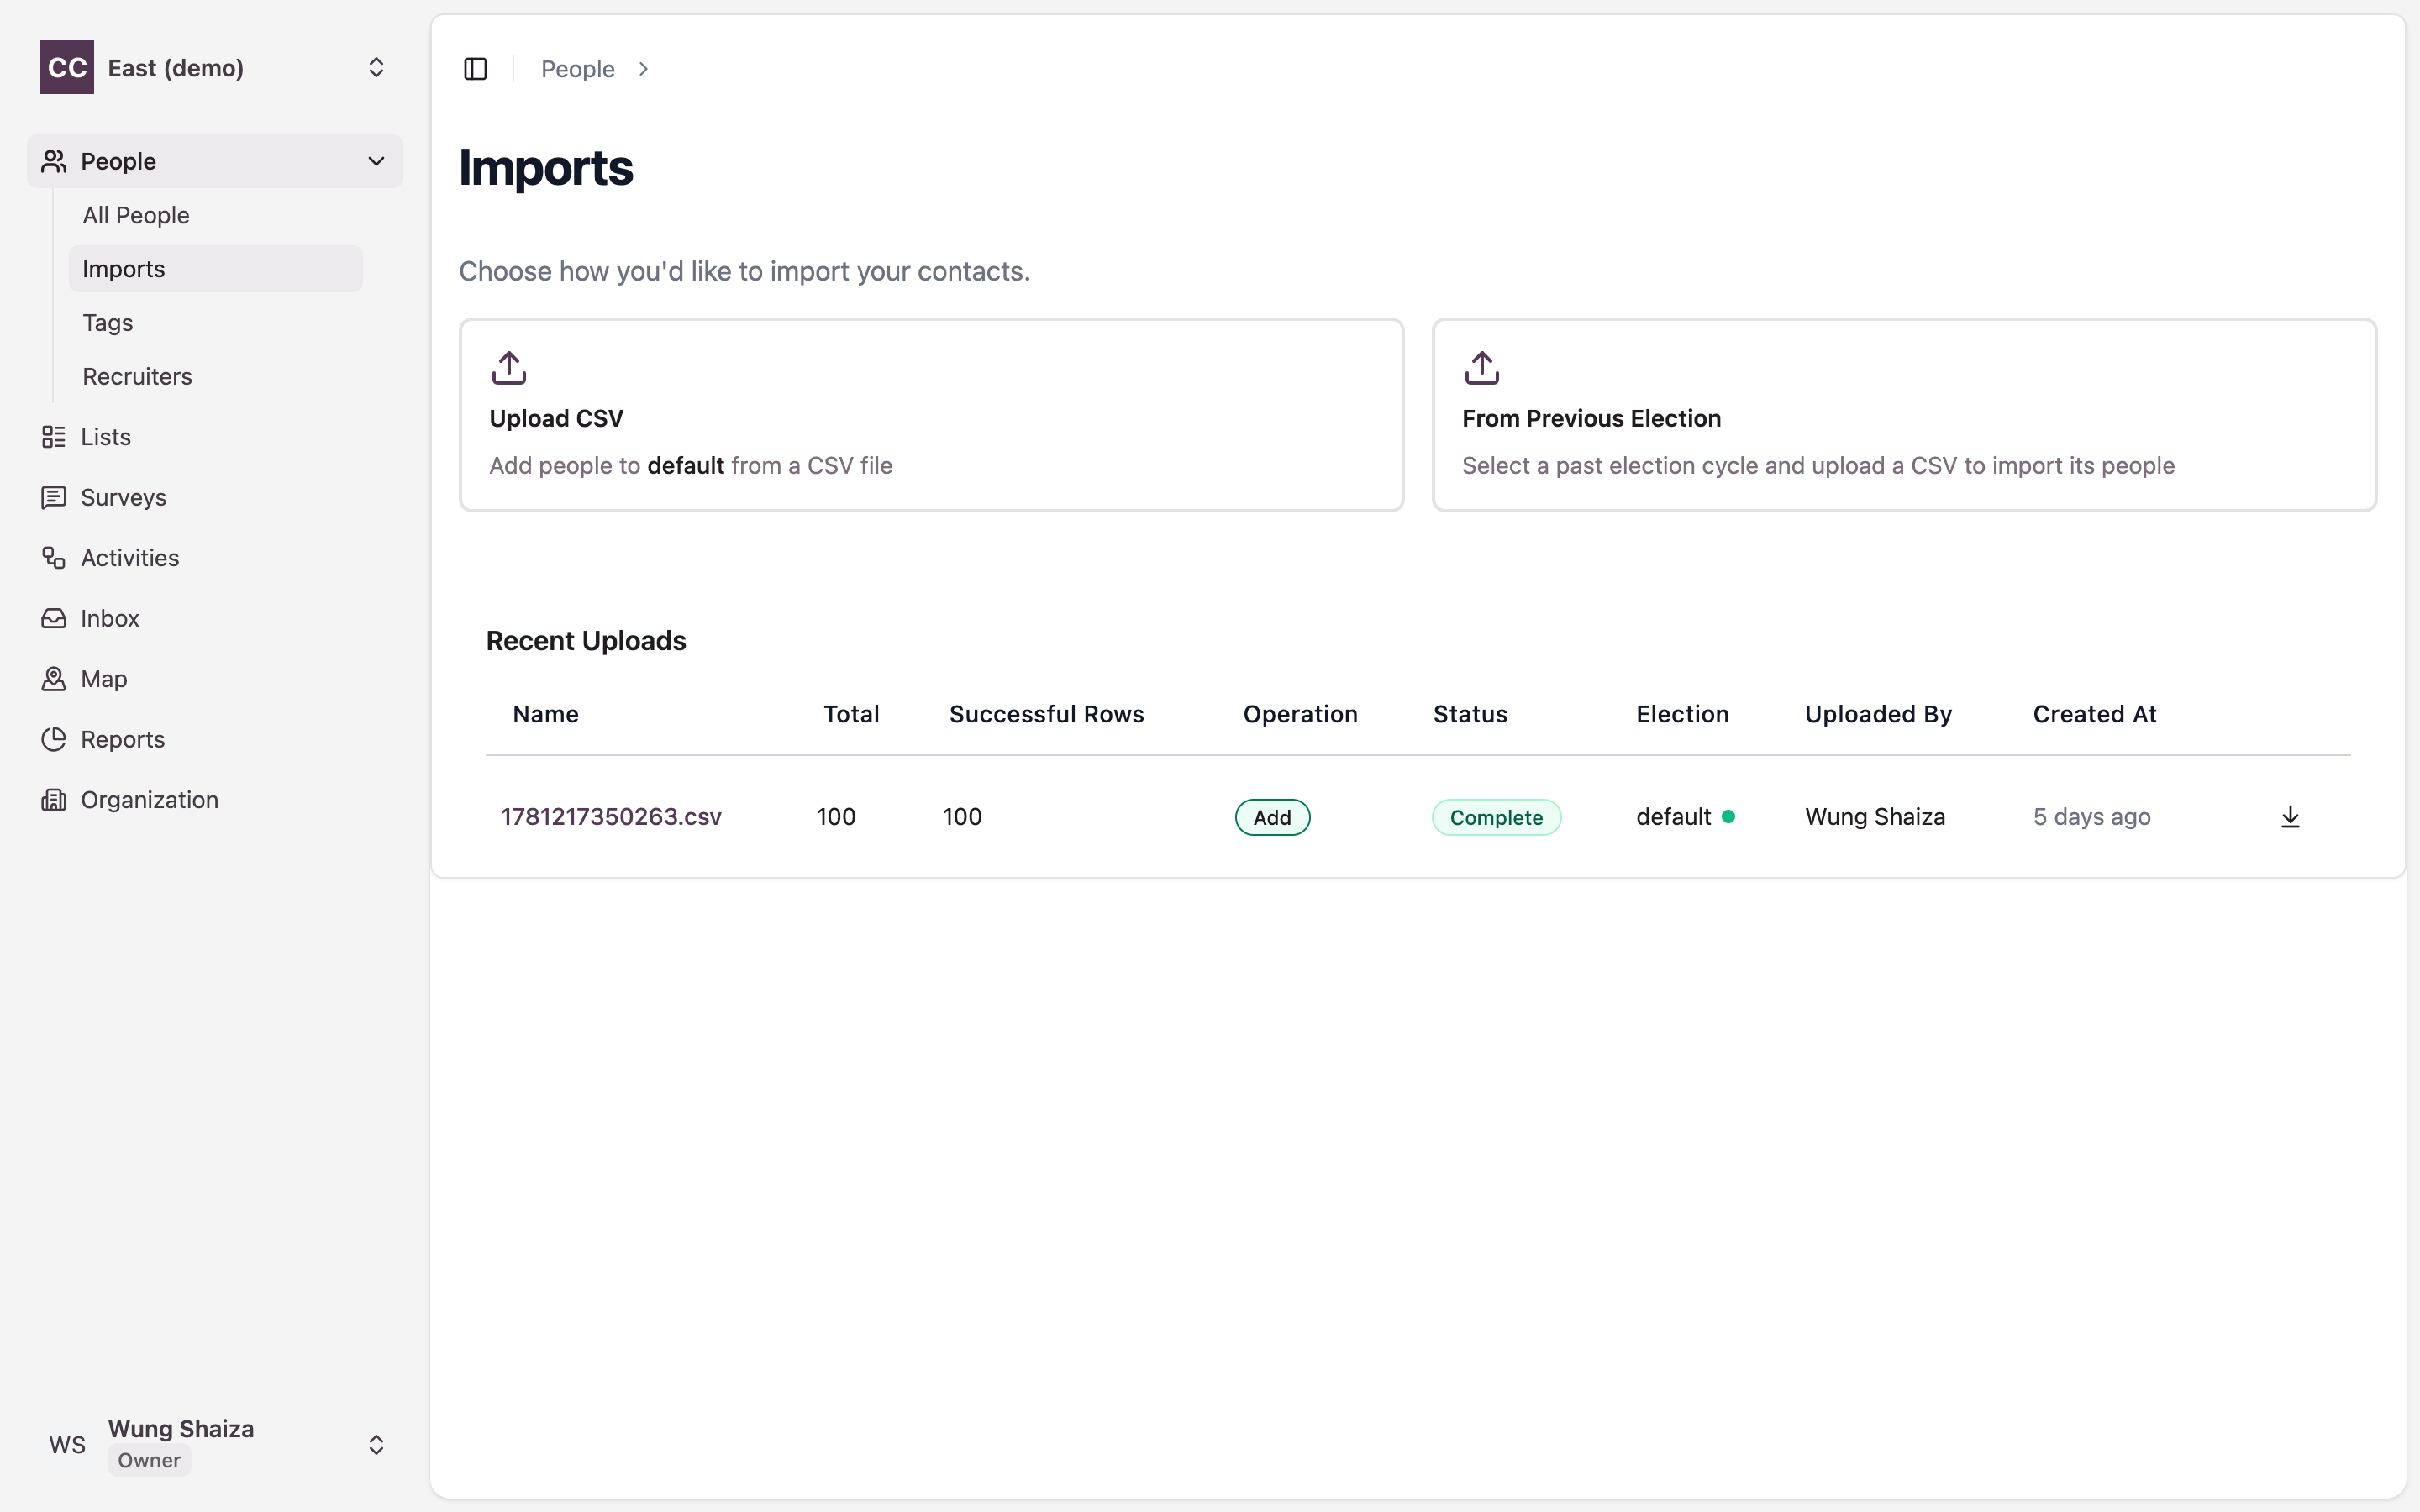
2. Choose how to import
Pick one of the two cards:
- Upload CSV adds people to your active election — its name shows right on the card.
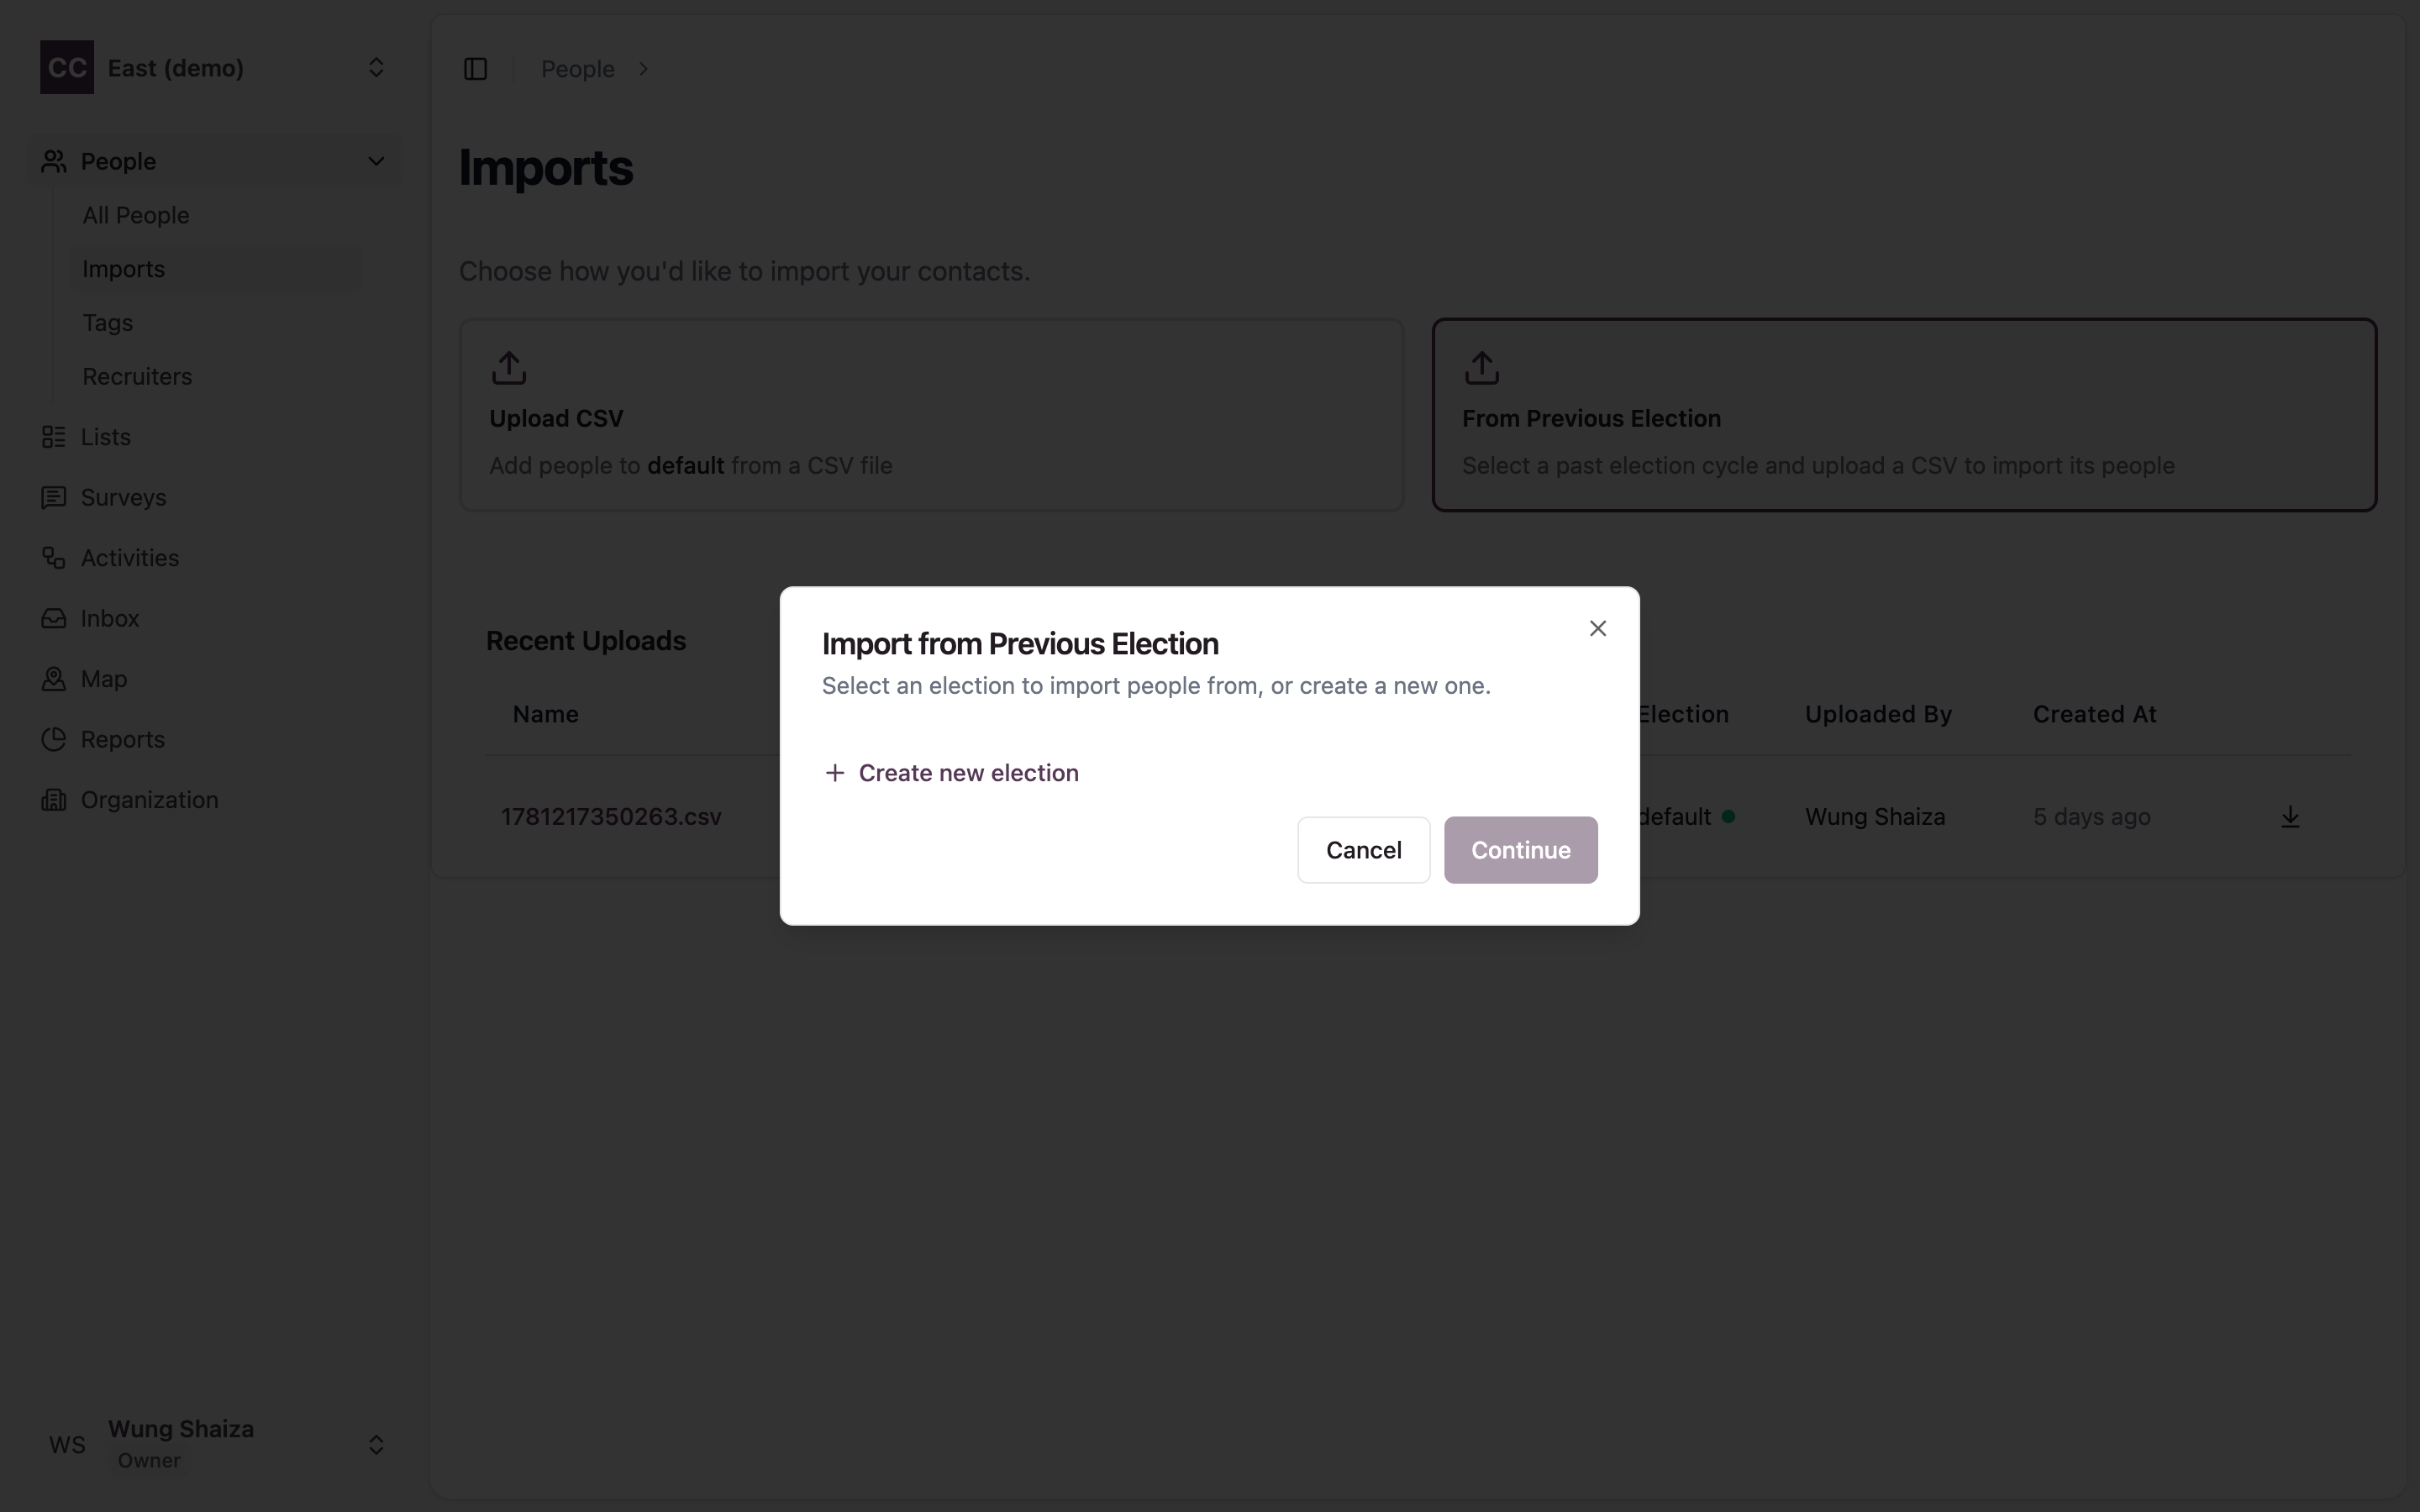
- From Previous Election opens a picker where you choose a past election, or Create new election, then click Continue.
Imports made through From Previous Election are always treated as adding people, so you won’t see the add-or-update choice for that path.
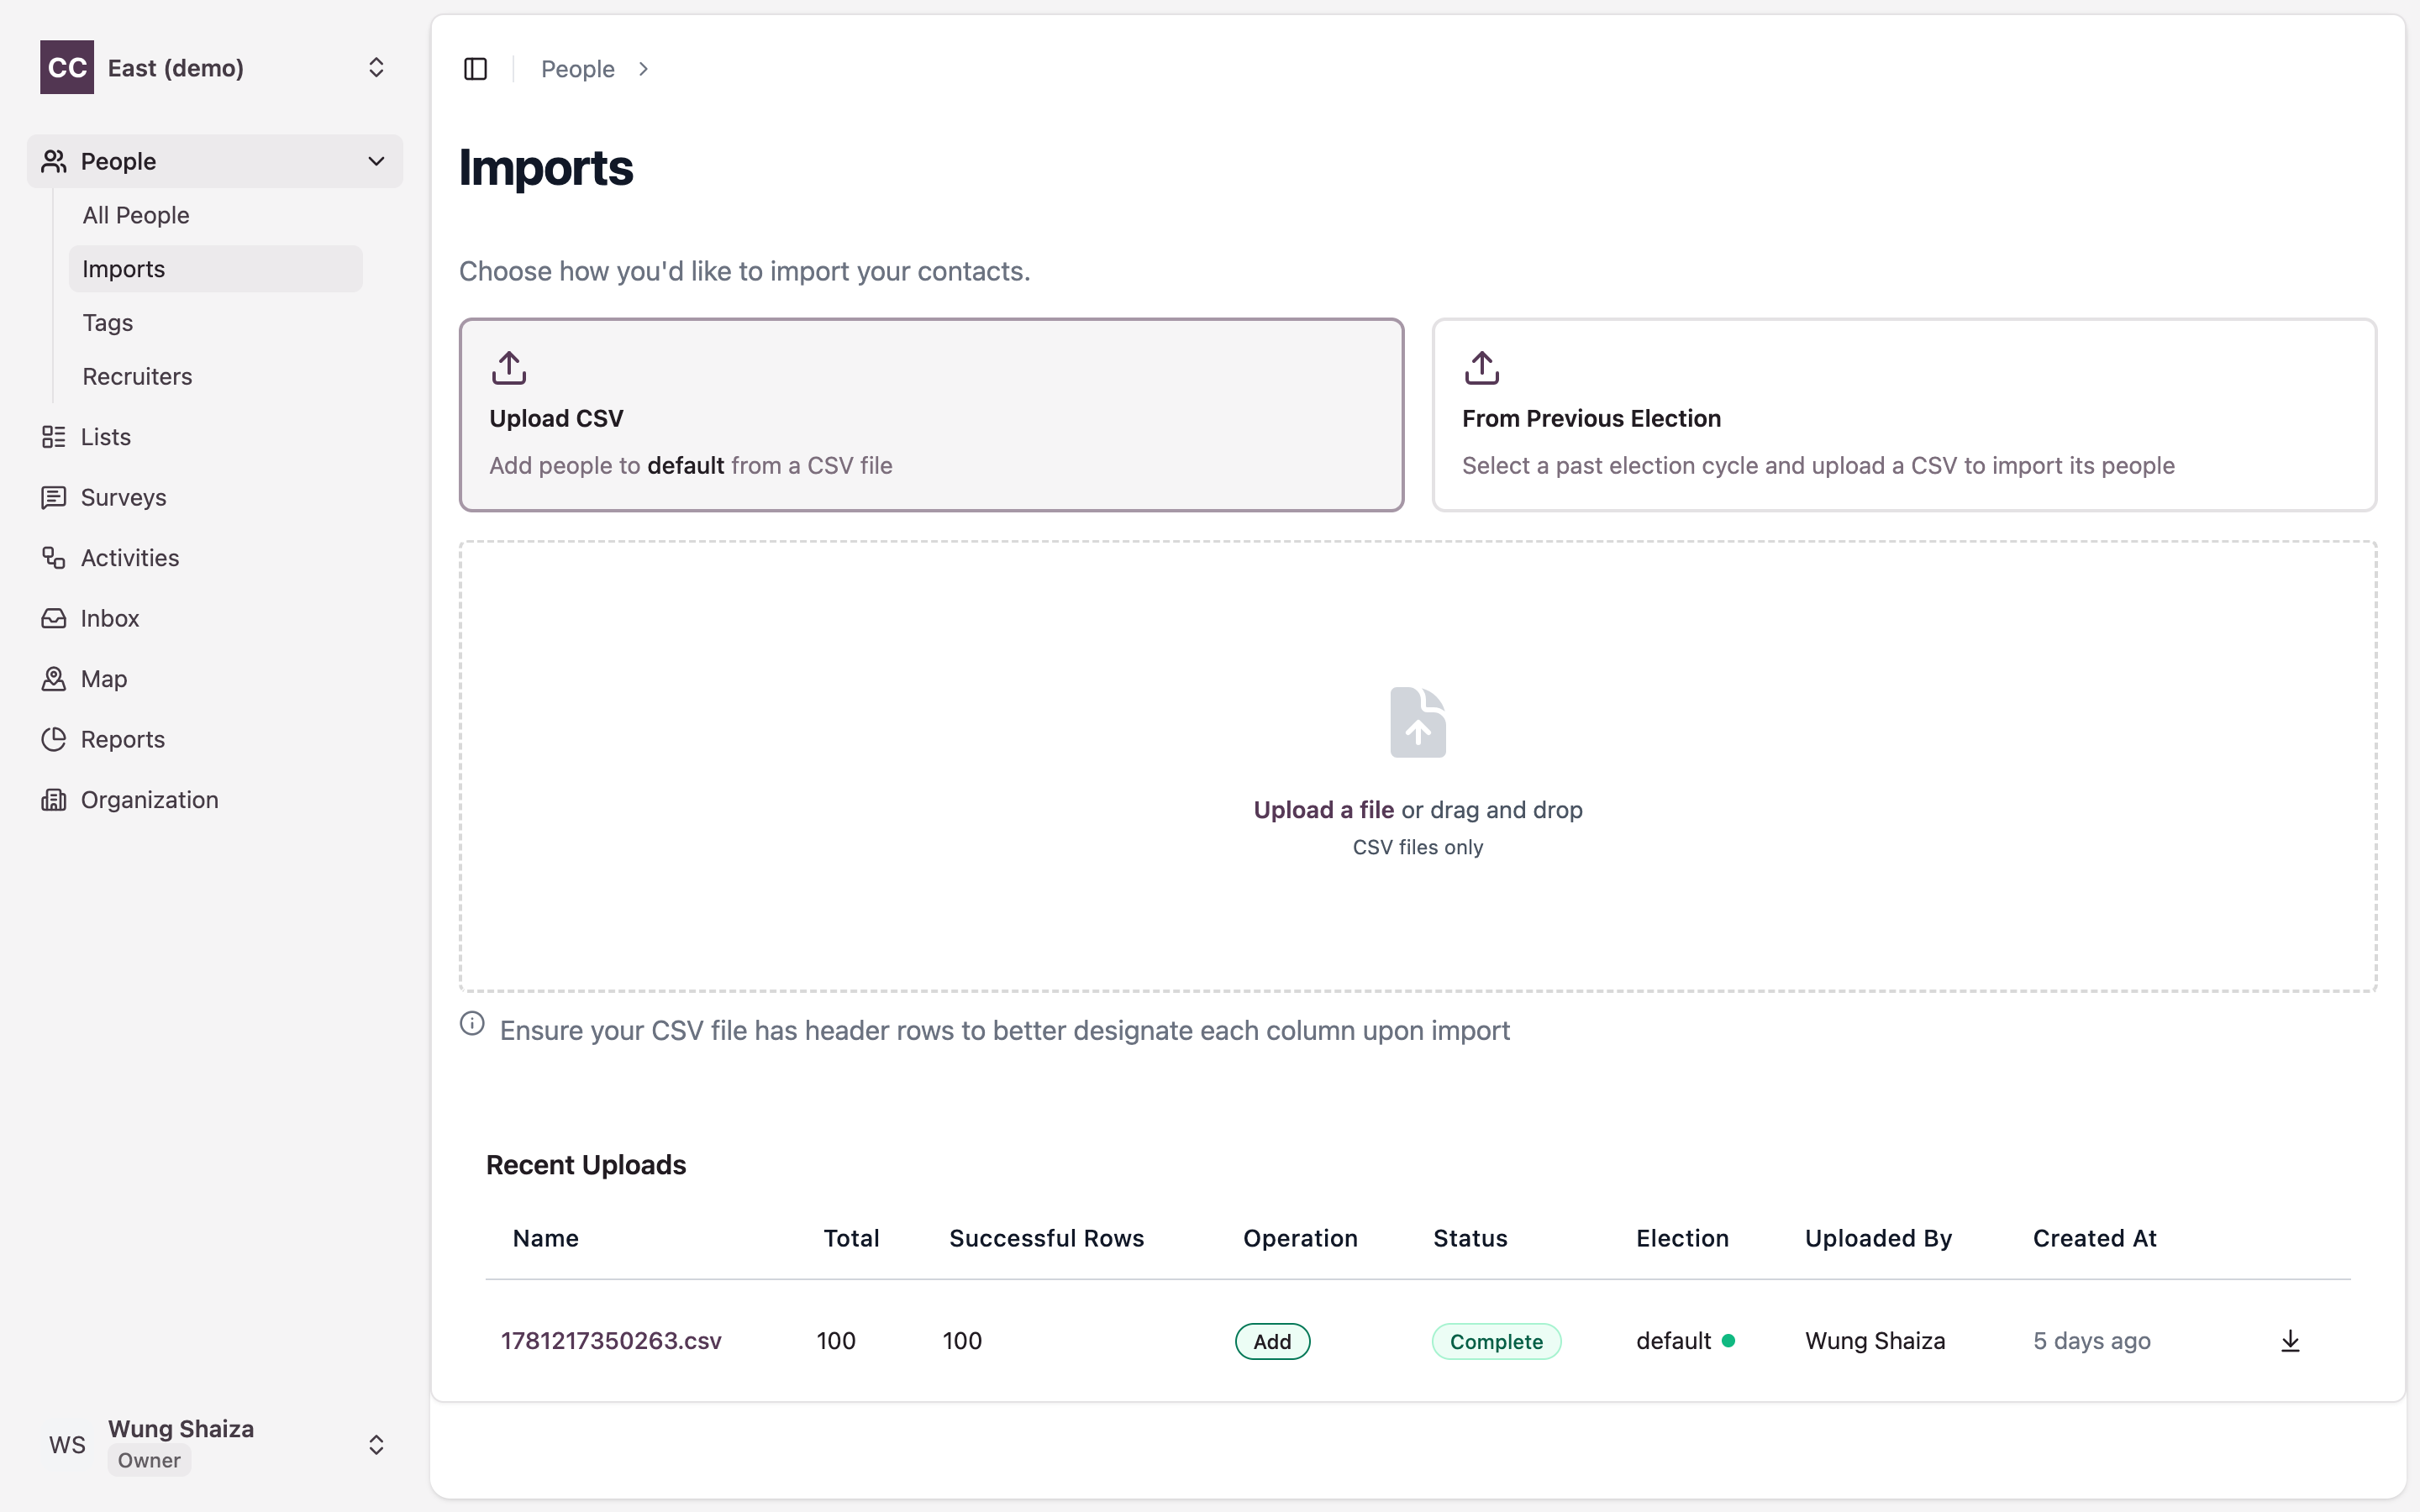
3. Choose your CSV file
Once you’ve picked a method, a drop zone appears. Drag your CSV onto it, or click to browse. Keep the header-row tip above in mind — those headers become the columns you map next.
Part B — Map your columns
After the file loads, the Upload people dialog opens. This is where you tell CampaignCTRL what each column means. The dialog numbers its own steps.
4. Choose the operation
Pick Add New People to create new records, or Update Existing to change people you already have. (This choice is hidden — and fixed to add — when you import from a previous election.)
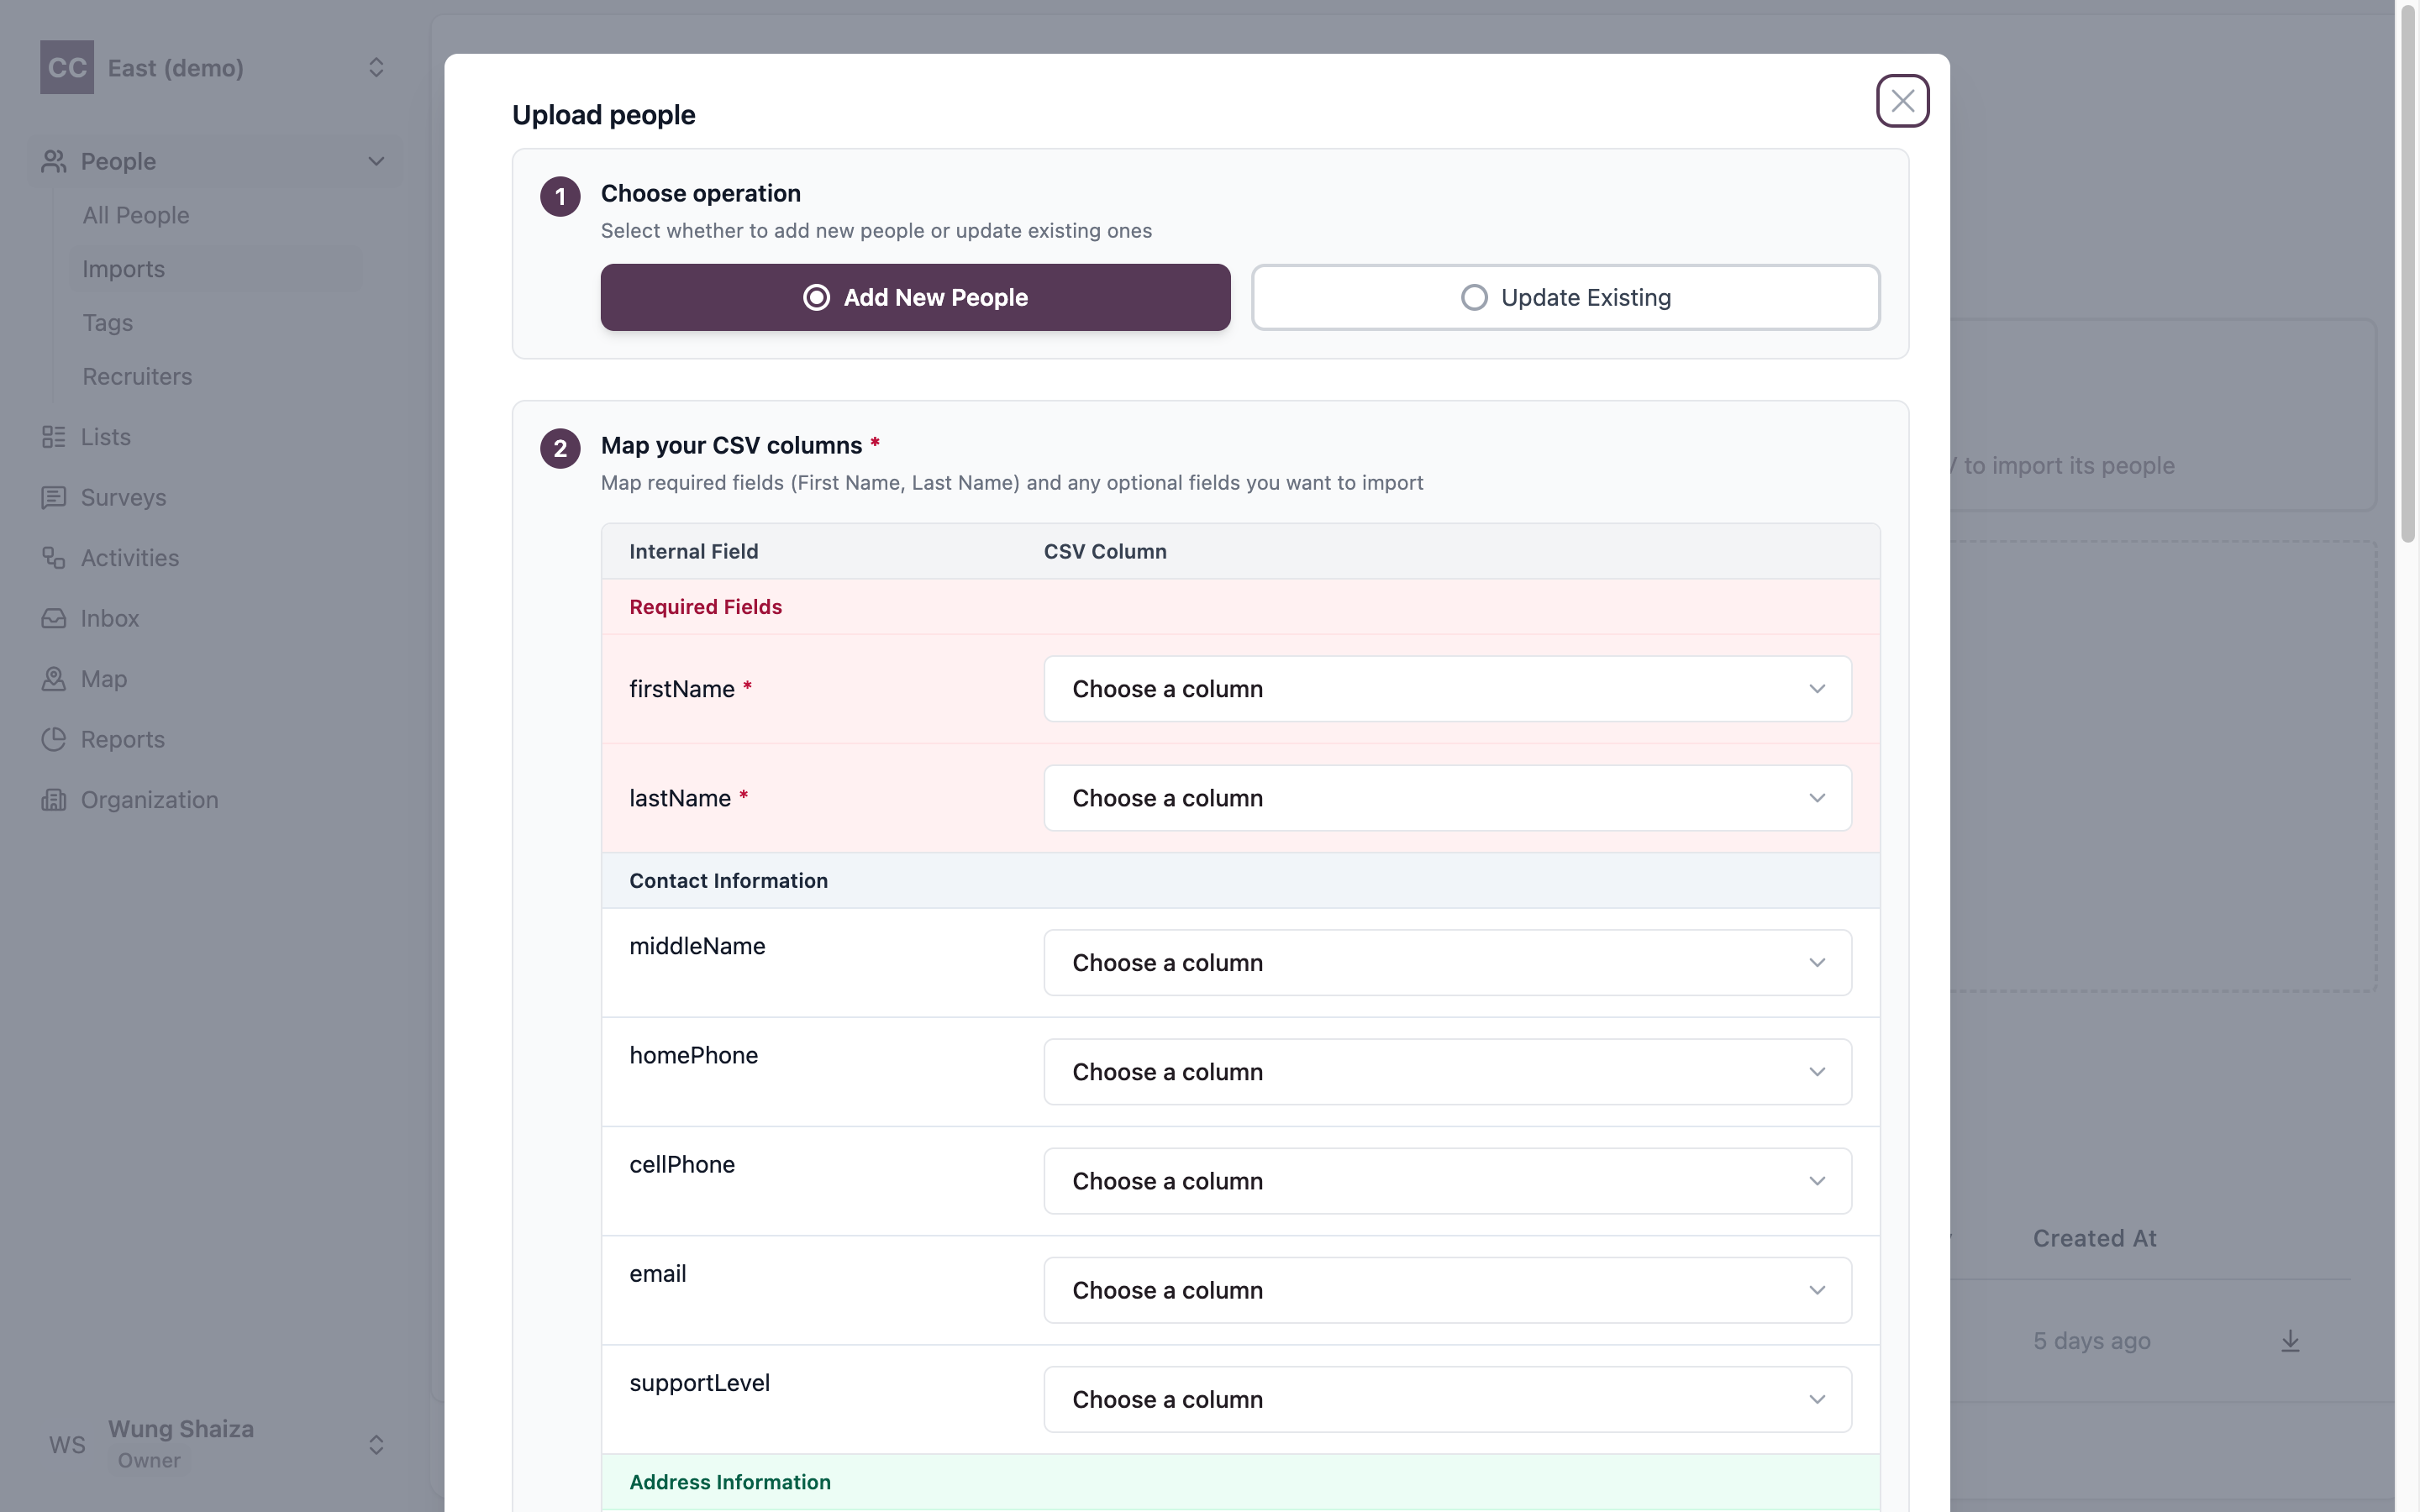
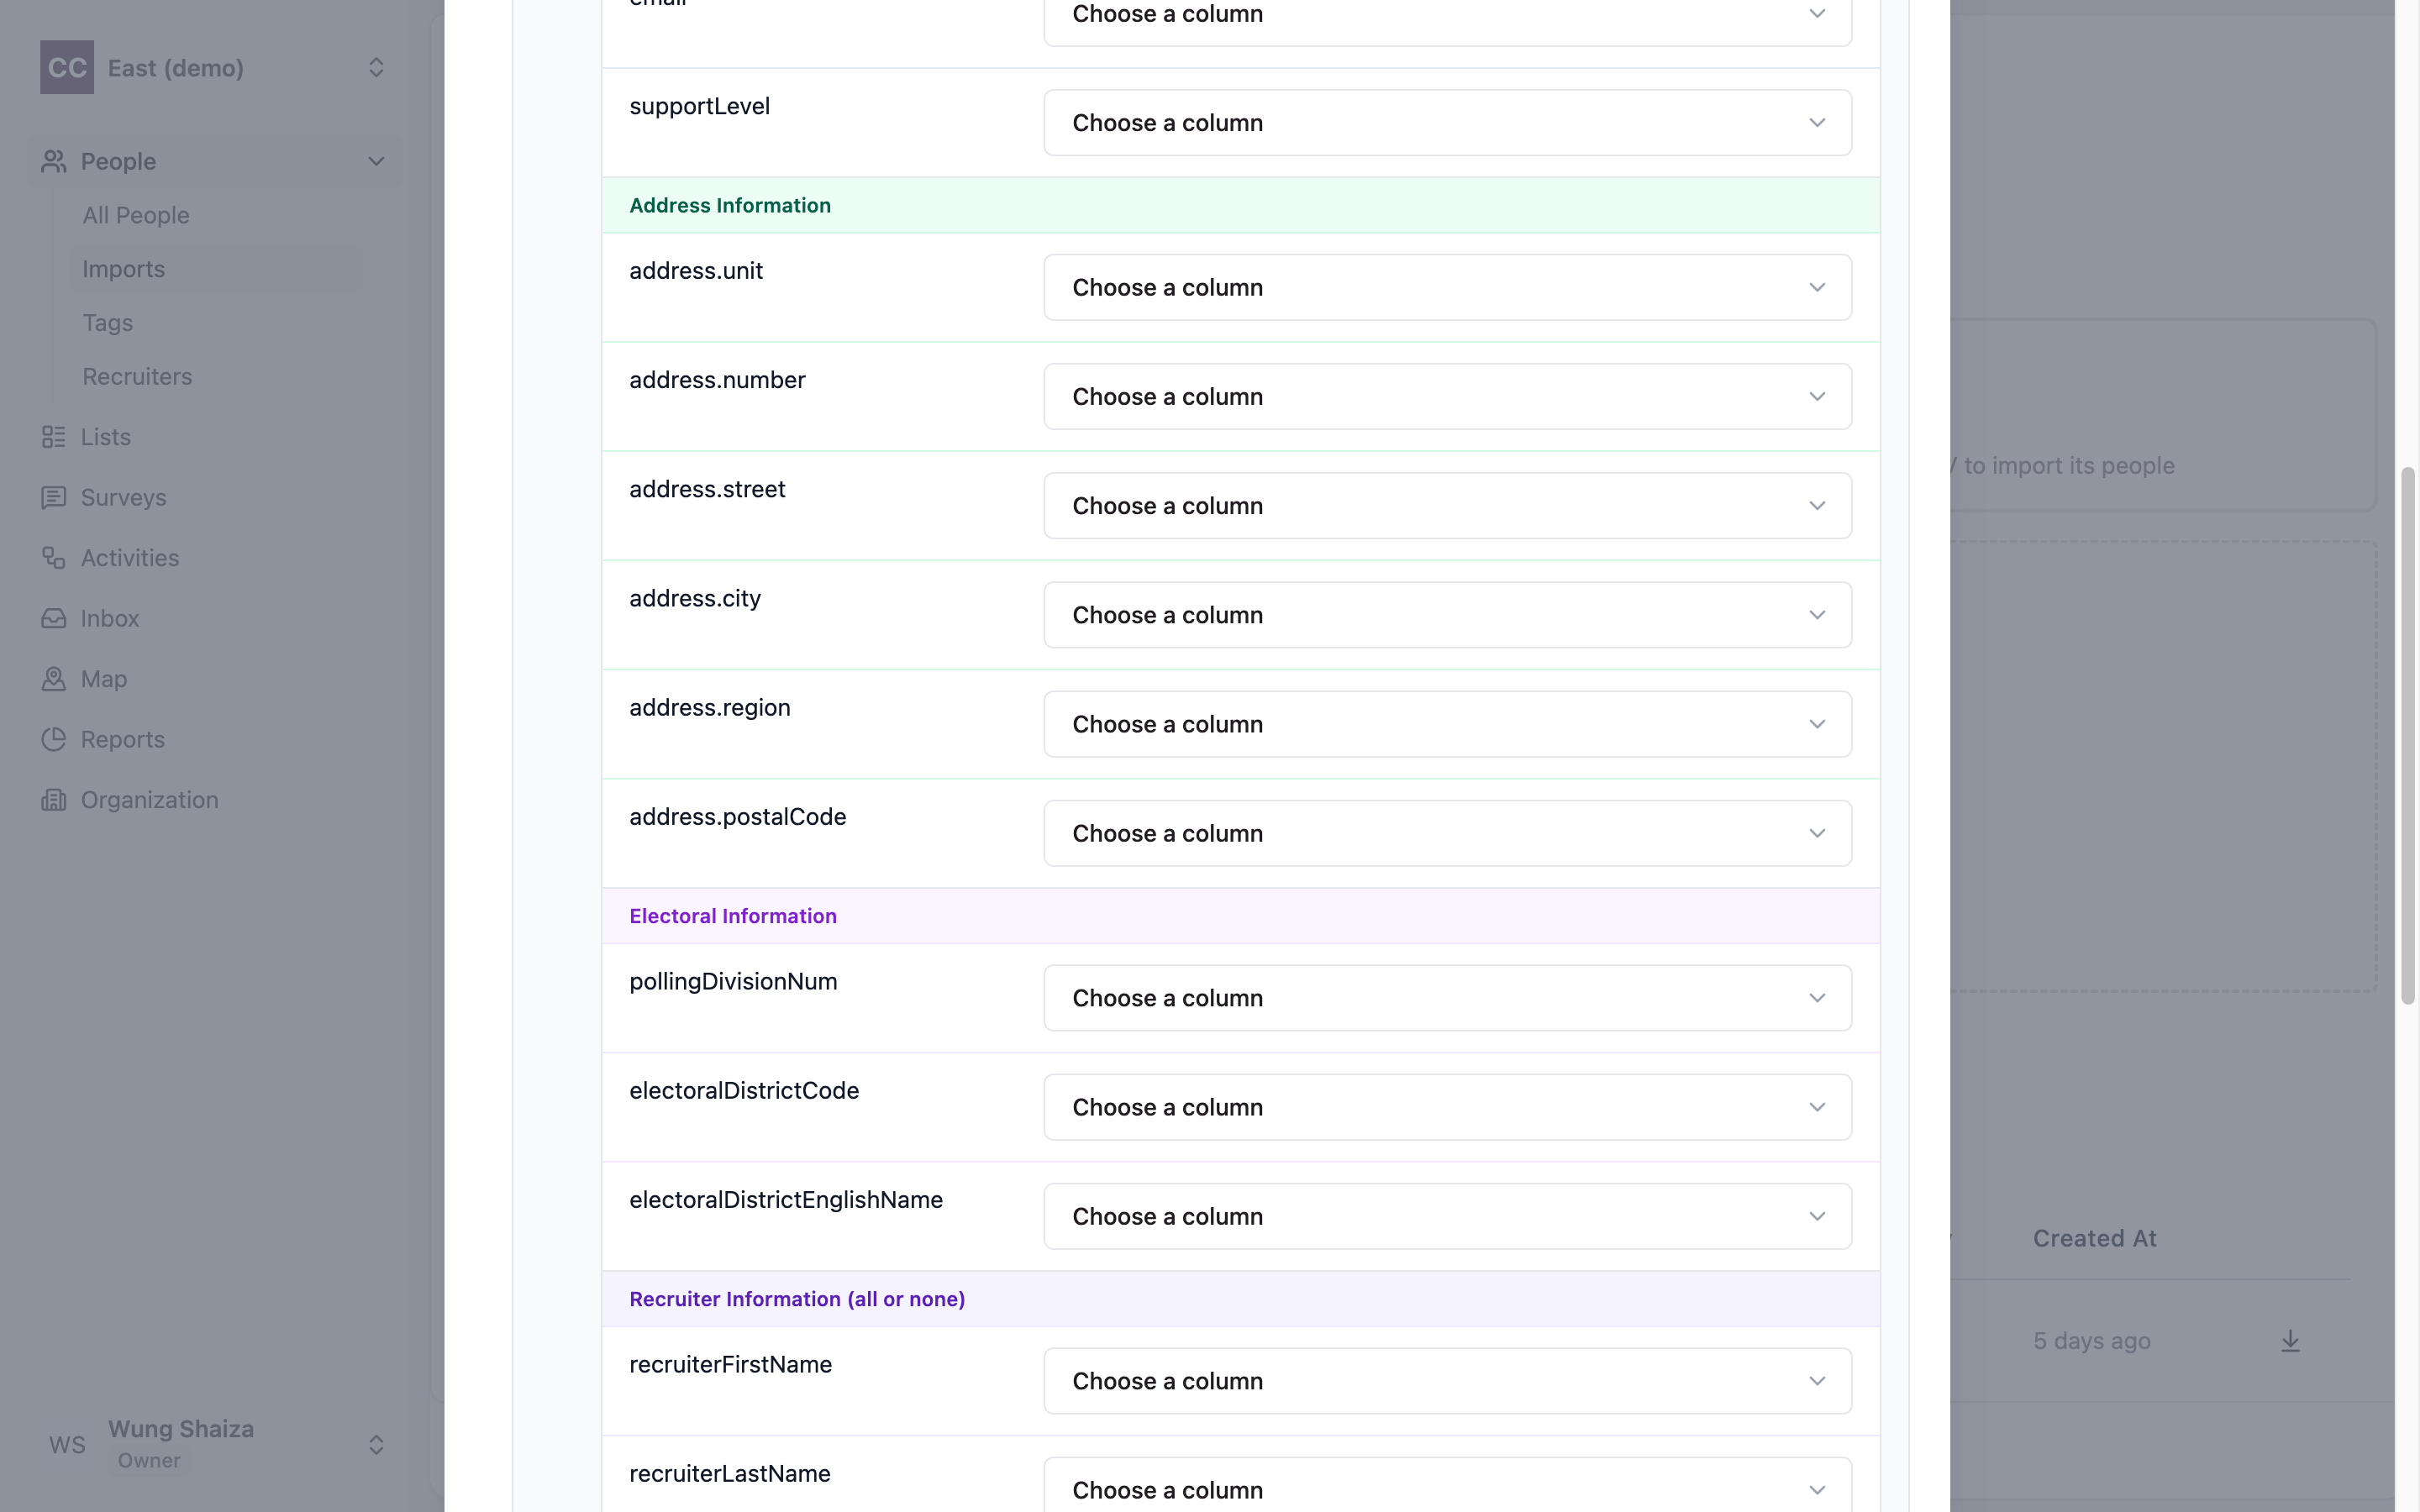
5. Map your CSV columns
For each CampaignCTRL field, choose the matching column from your file. The fields are grouped so they’re easy to scan:
- Required Fields (when adding) — map both firstName and lastName.
- Identifier Fields (when updating) — map id or externalId so the app knows which records to change.
- Contact Information, Address Information, Electoral Information, and Recruiter Information — optional groups for phone and email, street address, electoral district, and recruiter details.
A couple of rules the dialog enforces:
- Address is all-or-nothing. If you map one core address field — number, street, city, or region — map them all. (Unit and postal code stay optional.)
- Recruiter is all-or-nothing too. Map the recruiter’s first name, last name, and cell phone together, or leave all three blank.
CampaignCTRL also tidies up as it imports: people at the same address share one address record, so you won’t end up with duplicate addresses, and an existing recruiter is reused when the name and cell phone match rather than created again.
6. (Optional) Add custom fields
Need something CampaignCTRL doesn’t have a built-in field for? Under Add custom fields, create your own field for this organisation and point a CSV column at it (up to ten).
7. (Optional) Set geocoding and tags
- Geocoding — if your organisation has geocoding switched on, turn on Enable Geocoding to convert mapped addresses into map coordinates so these people show on the Map. It needs address fields mapped first.
- Tags — add one or more tags to everyone in this import, so you can filter them out again later. Reuse a tag you already have, or type a brand-new one and CampaignCTRL creates it for you.
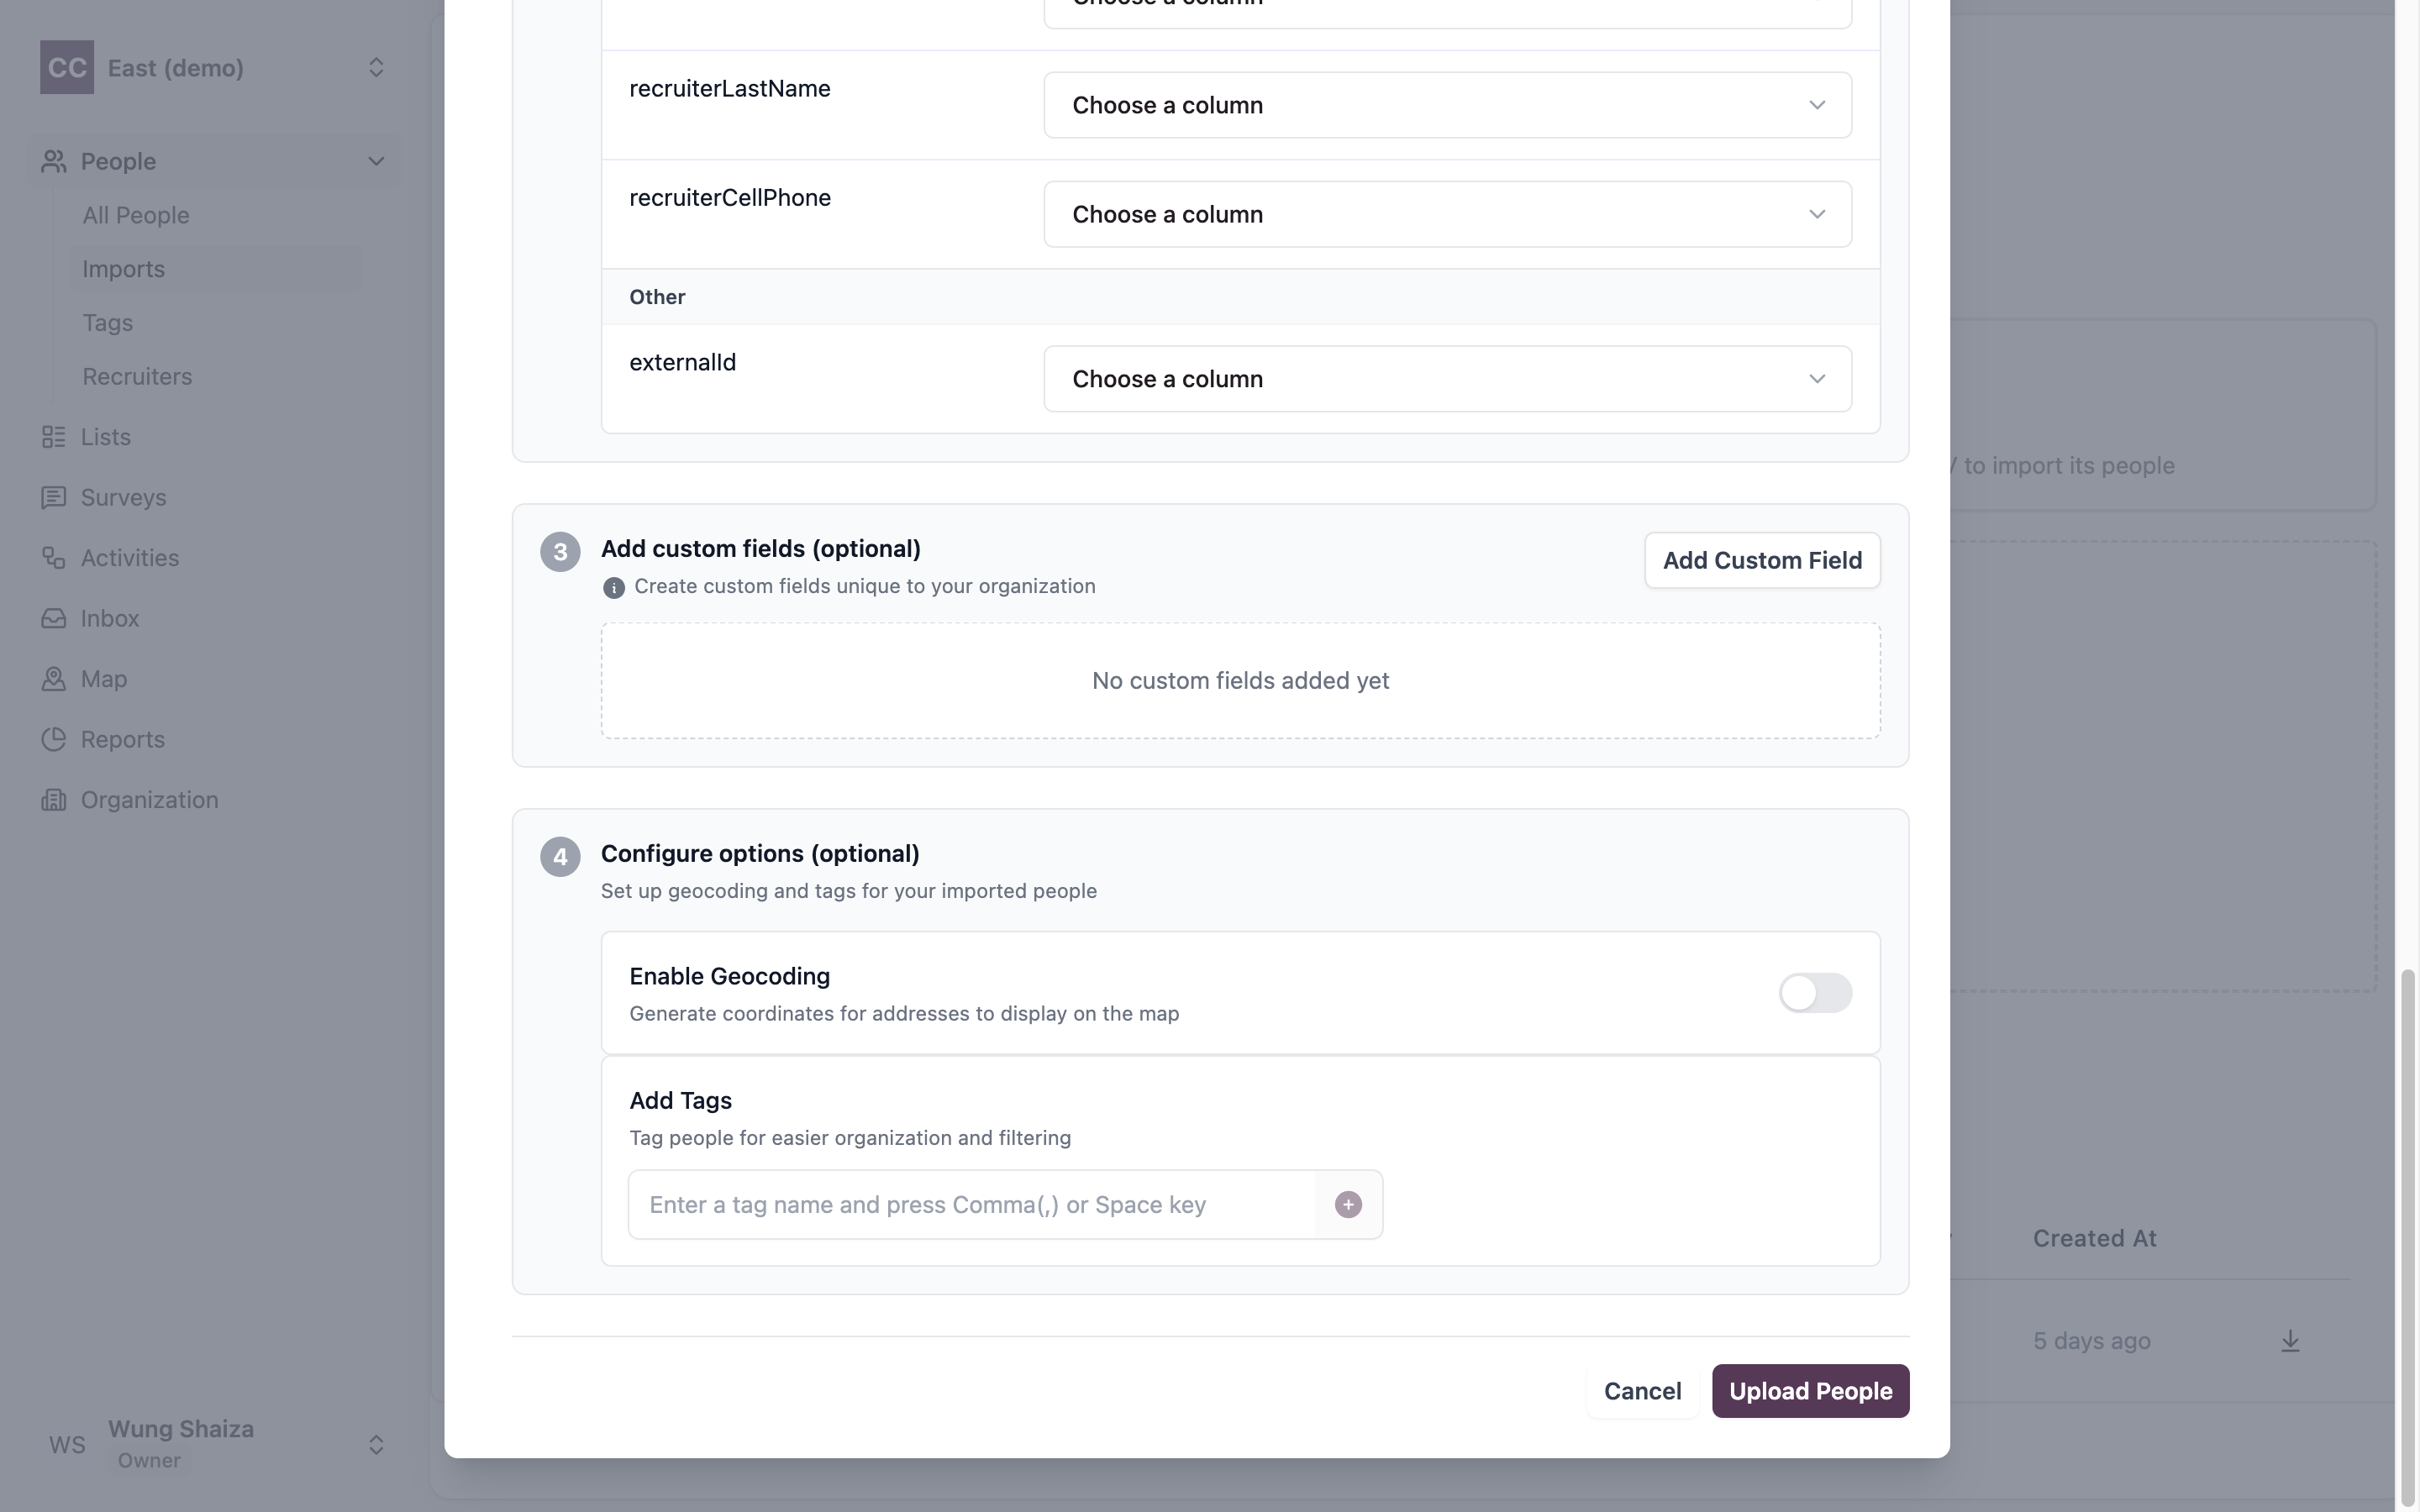
8. Upload
Click Upload People. CampaignCTRL starts processing your file in the background and returns you to your People list — you don’t have to wait on the page.
Part C — Check the result
Behind the scenes, CampaignCTRL queues your import and works through the file row by row, treating the first row as the headers. Each row is handled on its own: if one row has a problem, it’s set aside as a failed row and the rest carry on, so a single bad row never sinks the whole import.
9. Check the status
Back on People > Imports, your import appears in Recent Uploads with a status. Open it to see the detail page, which shows the rows added or updated, the number of failed rows, the geocoded counts, and the attribute mapping — the CSV columns you lined up with each field.
An import doesn’t land on its final status straight away. It moves through a few as your file waits in line, its rows are imported one by one, and — if you asked for it — addresses are geocoded. This is the journey a file takes:
graph TD
    U([You click Upload People]) --> W["pending / in-queue<br/><i>waiting to start</i>"]
    W --> PROC([Rows imported one by one])
    PROC -->|all rows failed| FAIL[fail]
    PROC -->|some rows failed| PARTIAL[partial]
    PROC -->|all rows succeeded| OK{Geocoding<br/>requested?}
    OK -->|no| DONE[complete]
    OK -->|yes| GEO[geocoding]
    GEO -->|all addresses found| DONE
    GEO -->|some not found| GPARTIAL[geocoding-partial-fail]
    GEO -->|none found| GFAIL[geocoding-fail]

    style DONE fill:#dcfce7,stroke:#15803d,stroke-width:2px
    style FAIL fill:#fee2e2,stroke:#b91c1c,stroke-width:2px
    style PARTIAL fill:#fef9c3,stroke:#a16207,stroke-width:2px
    style GPARTIAL fill:#fef9c3,stroke:#a16207,stroke-width:2px
    style GFAIL fill:#fee2e2,stroke:#b91c1c,stroke-width:2px
Here’s what each status means, and what to do when you see it:
| Status | What it means | What to do |
|---|---|---|
| pending / in-queue | The file has been received and is waiting to start. | Nothing — it’ll begin shortly. |
| geocoding | All rows are imported; addresses are now being looked up. | Wait for it to finish. |
| complete | Every row imported (and any requested addresses were geocoded). | Nothing — it worked. |
| partial | Some rows imported and some failed. | Download the failed-rows file, fix the rows, and re-import (step 10). |
| fail | Every row failed; no one was imported. | Download the failed-rows file, read the reasons, correct it, and import again (step 10). |
| geocoding-fail | People imported, but no addresses could be geocoded. | The people are in — retry geocoding or check the addresses. |
| geocoding-partial-fail | People imported, but some addresses couldn’t be geocoded. | The people are in — review the addresses still missing coordinates. |
A geocoding problem never loses people: when an address can’t be placed on the map, the person is still imported — only their coordinates are missing. And when an import fails outright (fail), no geocoding runs, because there are no imported people to place.
From an upload’s row or its detail page you can also:
- Continue — finish a still-pending upload by reopening the mapping dialog.
- Download (the ⬇ icon at the end of the row) — download a copy of the file. When the import had failures, this is the failed-rows file, with the reason for each one — see step 10.
- Enable geocoding — turn it on later if you skipped it and your organisation supports it.
- Delete people — undo the import by removing everyone it added. You can only do this while those people are still unused: once any of them have been added to a list — which could then feed activities — the option is no longer available.
10. Fix and re-import any failed rows
Whenever an import isn’t fully successful, CampaignCTRL keeps a failed-rows file — a copy of your upload that contains only the rows that didn’t import. To get it, find that import in the Recent Uploads list and click the download icon (the downward arrow, ⬇) at the end of its row.
Then open the file and look at the last column on the far right: CampaignCTRL adds a new column there spelling out the reason each row failed. It’s easy to miss, because it sits after all of your original columns — but that’s where the explanation for every failed row lives. Use those reasons to fix the rows, then import just that corrected file again.
The most common reasons a row fails:
- Missing identifier (Update only) — the row has neither an ID nor an External ID, so no existing person could be matched.
- Duplicate cell phone — if your organisation requires unique cell phone numbers, a row whose number already belongs to someone else is rejected.
- External ID conflict — the row’s external ID doesn’t match the one already stored for the matched person.
- Address inconsistency — a polling division or electoral district was given that conflicts with the address on record, or was given for a person with no address.
- Electoral district name mismatch — a district code in the file is paired with a different name than the one already stored for that code.
- Invalid or incomplete address — the address data doesn’t meet the requirements for import.
Heads up — duplicates. If your organisation has person de-duplication turned on, CampaignCTRL automatically runs a duplicate scan across your people once an import finishes (unless it failed entirely), helping you reconcile any duplicates the import — or your existing data — may contain.
Related
- Lists — turn your imported people into targeted lists.
- User roles — who can manage and import people.